
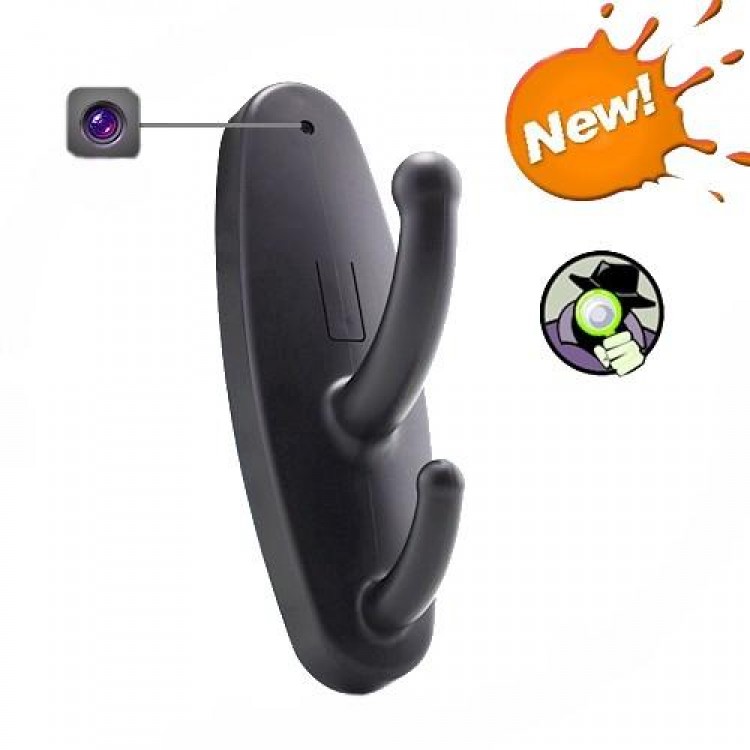

Description
The Cloth Hook Camera Hidden DVR is a discrete way to monitor your home or office. High-definition and high-quality video recording can be set to activated manually or by motion detection with the touch of a button.
Getting Started
1)The first step to getting your Clothes Hook Camera to work is to charge it.
The device can be charged by connecting it using the included USB cord to your computer or an AC outlet using the included adapter. The light will blink green while the device is charging and glow solidly when the battery is full. Before using the device for the first time, it is suggested that you charge the camera for about 5 hours.
2)Before inserting a micro SD card, make sure the card is formatted correctly.
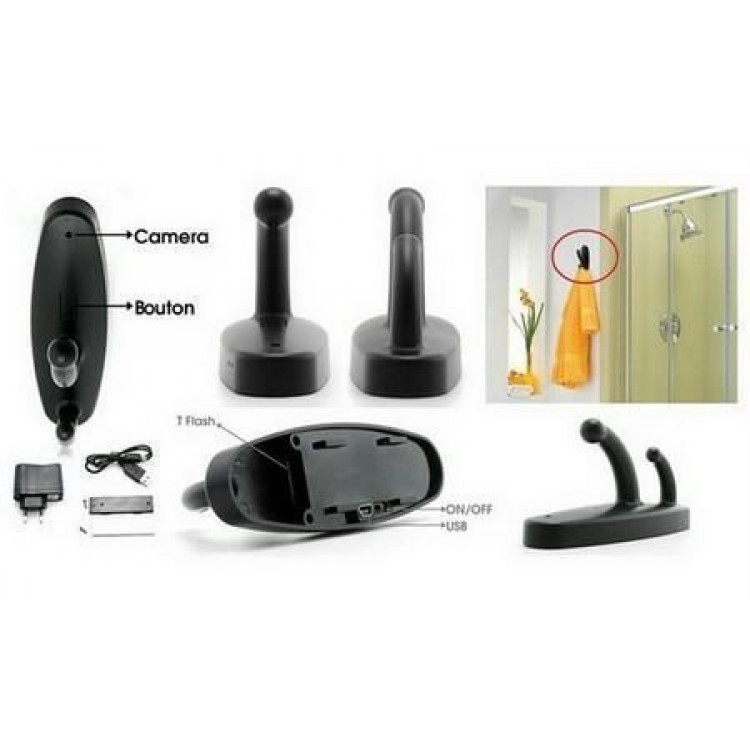
The device can be record in the FAT 16/32 format. The Spy Clothes Hook Camera is compatible with micro SD card up to 16GB capacity. Once it has been formatted, insert the micro SD card in the memory card slot on the device with the gold contacts facing inward. When secure, you will feel the card “click” into place. To remove the card later, simply push on it and it will spring out. To power the device on, move the power switch to the ON position. With the switch set to ON, hold down the Video button for 3 seconds and release it. The light will blink 5 times and then glow solid to indicate it is in Standby mode. To power the device off, hold down the Video button for 2 seconds. The light will blink 3 times quickly, and then go out. If the device remains in Standby for longer than 5 minutes, it will automatically power off.
Manually Recording Video
From Standby mode, press the Video Button. The light indicator will blink once and go out to indicate that it is recording. Video will be recorded in 5-minute segments. To stop recording, press the Video button again. The current video file will be saved and the light will glow green to indicate the device has returned to Standby mode. When saving a file, wait 5 seconds once the device returns to Standby mode before giving it any commands.
Recording Motion Activated Video
To set the Clothes Hook Video Recorder to record video when motion is detected, set the device to Standby mode. From standby, press the Video button twice, and the light will blink 3 times and go out ot indicate it is set to record. Each time the device detects motion, it will record a 5-minute video. To exit motion detection recording. Press the Video button. The current video file will be saved and the LED will glow green to indicate the device has returned to Standby mode. When saving a file, wait 5 seconds once the device returns to Standby mode before giving it any further commands.
Viewing Recorded Files
To view your files, simply connect the device via the supplied USB cord with the Micro SD card properly inseted into the device, making sure it is powered off. It will connect as a removable drive, and depending on the settings on your PC, it may automatically notify you that new hardware was detected. If so, select Open Folder to view Files. If it is not automatically detected, click Start on your desktop. Select My Computer if you are using Windows XP, or Computer if using Windows Vista or Windows 7. The device should be listed as a Removable Disk under the Devices With Removable Storage section. Open that drive, which will contain a folder called DCIM. Within that folder is another folder labelled 100DSCIM. This folder contains your videos and photos. Move the files onto your computer to view them. Because of the high quality of these video recordings, viewing hem from the device may result in them appearing “choppy”. If your media player has any problems opening recorded videos you can download KM Player for free through Google search it. When disconnecting your device from a computer, always be sure to use the Safely Remove Hardware utility in Windows.
Setting Time and Date
Setting the time and date stamp on your device is easy. Simply create a .txt file on your computer and name it “time”. In that file you will enter the date and time in the following format: year-month-day hour:minute:second.(Ex. 2013-3-21 12:00:00) Once you’ve created the file, connect the device to your computer via USB and save the .txt file to the device’s root directory. When you connect the device to your computer, it will be assigned a drive better (ex. C:, D:, E:). When you open that drive, you are in the root directory, or topmost level of the drive.
After you have loaded the file, safely discounnect the device from your computer, turn the device on and off, and the time and date you loaded should now appear on any new videos from your computer.
Battery Life: Approximately 120 minutes of video recording.
Video Format: AVI
Video Storage: Approximatly 20 minutes per GB
Memory Card: Micro SD up to 16GB
Installation:
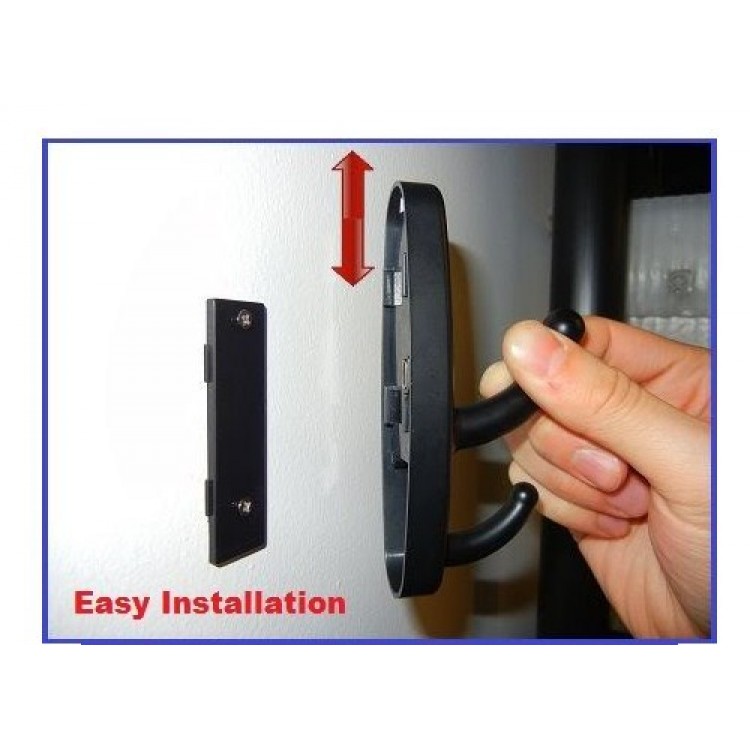
For the best quality, it is recommended you mount the device between 5.5 feet and 6 feet from the floor with its area of view between 1 and 15 feet from the camera. To mount the device on a wall or door, put the flat side of the mounting board directly against the surface on which you wish to install the device. Be sure that the arrow on the mounting board to the wall. You can now pleace mounting board and slide it down to the lock it into place. To remove it, slide it up and pull it away from the wall.
Troubleshooting
1)Problem: The light blinks and goes out as soon as I power it on with the Video button.
Solution: This means that the device is not reading the micro SD card. Ensure the card is inserted securely, and formatted correctly.
2)Problem: The light on the device is “stuck” and is not responding to any commands.
Solution: This issue occurs most commonly when the device is given too many commands too quickly. This can cause it to freeze up. If this occurs, move the power switch to OFF and then back to ON. This should reset the device.
Reviews
There are no reviews yet.